Tel.
01538 756800
LEDs
LED is the acronym for Light Emitting Diode.
LEDs have generally replaced bulbs for lighting models. Some reasons for this are-;
1) LEDs give pure colours,
2) LEDs are available in many different colours
3) LEDs have a much longer lifetime than bulbs.
4) LEDs don’t get hot.
5) LEDs consume less electricity than bulbs so approximately three times more LEDs than bulbs can be powered from the same power supply..
In fact with these advantages they are now being used for full size railway signals. However LEDs are electronic devices which work differently from and are not a direct replacement for bulbs.

Like all other diodes current will only flow through the LED in one direction. In other words the LED has a positive and a negative leg. The positive leg (called anode) can easily be identified because it is the longer leg and the positive wire of the power supply must be connected to this leg.
The LED only lights up when the current is flowing. The higher the current the brighter the LED but if the current is too high (typically above 30 milli Amps) the LED will be destroyed. The current through an LED is limited by using a resistor. The resistor can be attached to either leg of the LED. Generally a 1K (ie 1000 ohm) ¼ watt resistor will be fine.
The brightness of the LED can be increased by using a lower value of resistor. Our eyes do not notice small changes in brightness so you probably need to half the resistance value to see a noticeable difference.
Some LEDs have built in resistors (actually an electronic circuit which does the same job as a resistor) but these are less flexible as there brightness cannot be altered they cannot be wired in series and need a specific voltage for them to work. These LEDs are usually described as 5Volt or 12 volt LEDs. LEDs without a built in resistor have a voltage of between 2 and 3 volts depending on the colour of the light the LEDs emit. If the LEDs are being powered from a 12 Volt power supply there is plenty of voltage left over to power a two or three LEDs, the diagram shows how to connect two LEDs in series.

Powering from AC
LEDs should normally only be used with DC electricity as AC electricity can destroy them.
If you need to power LEDs from an AC supply then you can either use a diode to change the AC to DC or you can use two LEDs arranged to light on either phase of the electricity. Note the long leg of one LED connects to the short leg of the other.

LEDs are available in a large range of sizes, there are a very large range of 3mm and 5mm diameter these have long legs to which it is easy to attach wires. Apart from indications on control panels these LEDs are useful for lighting the interiors of buildings and for making colour light signals (3mm diameter is close to the size of the lens of 4mm scale colour signals. For lighting buildings white can look too bright, although a good representation of a fluourescent light, either yellow LEDs or ones described as warm white look more realistic.

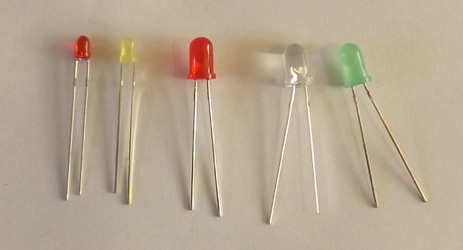
The two LEDs on the left are 3mm diameter and the three on the right are 5mm diameter. The transparent LED emits blue. The working part of LEDs is encapsulated in a material which is often tinted with the colour of the LED but it may be left clear. Provided you are careful not to reach the semiconductor inside the encapsulating material can be filed to change the size and shape of LEDs.
Very small (Surface Mount) LEDs

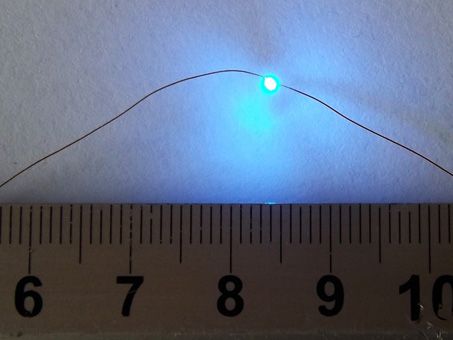
Extremely small LEDs less than a 1mm cube in size are also available. These are described as surface mount. Surface mount components are intended for a manufacturing method where the circuit board is assembled by machines and components are soldered to the top of a circuit board rather than having legs that go through holes to solder onto the underside of the surface mount. Because they are so small and have no legs surface mount LEDs are very difficult to attach to wires. To overcome this difficulty we have surface mount LEDs ready attached to 0.1mm diameter enameled copper wire. To identify the positive and negative legs of the LEDs the wires are colour coded. The positive is a red colour and the negative is copper. This does not show up in the photographs.
The surface mount LEDs need to be used with a resistor. The enamelled copper wires are easily soldered to. The heat of the soldering iron removes the insulation. The fineness of the wires may make it difficult to grip them in a terminal block. They are suitable for use with our boards for example blue surface mount LEDs would be easily fitted to an emergency vehicle and made to flash using our Flashing LED board.

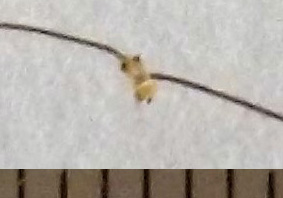
A very enlarged picture of a surface mount LED, the scale is millimetres.